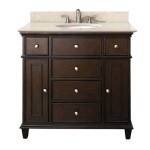
How To Replace Vanity Top In Bathroom
Replacing a bathroom vanity top is a relatively simple task that can be completed in a few hours. By following these step-by-step instructions, you can save yourself the cost of hiring a professional. Step 1: Gather Your Materials You will need the following materials to replace your vanity top: - New vanity top - Vanity top adhesive - Caulk gun - Caulk - Utility knife - Measuring tape - Level - Screwdriver - Wrench Step 2: Remove the Old Vanity Top First, turn off the water supply to your bathroom sink. Then, remove the sink fixtures, including the faucet, drain stopper, and any other hardware. Next, use a utility knife to cut the caulk around the perimeter of the old vanity top. Be careful not to damage the countertop or the vanity cabinet. Once the caulk has been cut, use a screwdriver to remove the screws that are securing the vanity top to the vanity cabinet. Finally, carefully lift the old vanity top off of the vanity cabinet. Step 3: Prepare the Vanity Cabinet Once the old vanity top has been removed, you need to prepare the vanity cabinet for the new top. First, clean the surface of the vanity cabinet with a damp cloth. This will remove any dust or debris that could interfere with the adhesion of the new vanity top. Next, apply a thin layer of vanity top adhesive to the surface of the vanity cabinet. Be sure to follow the manufacturer's instructions for the specific adhesive you are using. Step 4: Install the New Vanity Top Once the vanity cabinet has been prepared, you can install the new vanity top. First, carefully lift the new vanity top onto the vanity cabinet. Be sure to align the top with the front edge of the cabinet. Next, use a level to make sure that the vanity top is level. Adjust the position of the top as necessary. Once the vanity top is level, use a screwdriver to drive screws into the pre-drilled holes in the top. Be sure to tighten the screws securely. Step 5: Caulk the Vanity Top Once the vanity top is installed, you need to caulk the perimeter of the top to seal it and prevent water from leaking. First, apply a thin bead of caulk to the joint between the vanity top and the vanity cabinet. Be sure to follow the manufacturer's instructions for the specific caulk you are using. Next, use your finger or a caulk tool to smooth the caulk and create a neat, finished appearance. Step 6: Reinstall the Sink Fixtures Once the caulk has dried, you can reinstall the sink fixtures. First, install the drain stopper in the drain hole. Then, install the faucet in the faucet hole. Finally, connect the water supply lines to the faucet. Step 7: Enjoy Your New Vanity Top Once the sink fixtures have been reinstalled, your new vanity top is ready to use. Enjoy your updated bathroom!

Replace Vanity Top And Faucet Diy Network Youtube

How To Remove Replace A Vanity Top Easy Bathroom Sink Remodel Youtube

How To Replace A Bathroom Countertop Homeadvisor

Replace Granite Countertops Transform Your Bathroom S Look

How To Replace A Vanity Top And Save Craving Some Creativity

How To Remove A Countertop From Vanity Decor Adventures

Replace Vanity Top And Faucet Diy Network Youtube

Replace Vanity Top And Faucet Diy Network Youtube

Diy Vanity Tops For Your Bathroom

Diy Replace Vanity Top Youtube


