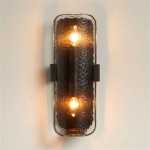
How To Install Bathroom Vanity Light
Upgrading the vanity light in your bathroom is a relatively straightforward project that can be completed in a few hours. With a little preparation and the right tools, you can give your bathroom a whole new look without breaking the bank.
Tools and Materials
- New vanity light fixture
- Screwdriver
- Wire cutters
- Electrical tape
- Level
- Drill (if mounting to tile or stone)
Step 1: Safety First
Before you start any electrical work, it's important to turn off the power to the bathroom at the circuit breaker. This will help prevent any accidents.
Step 2: Remove the Old Fixture
Once the power is off, you can remove the old vanity light fixture. Start by unscrewing the mounting screws that hold the fixture in place. Then, carefully pull the fixture away from the wall.
Step 3: Disconnect the Wires
Once the fixture is removed, you'll need to disconnect the wires. Use a screwdriver to loosen the wire nuts that connect the wires from the fixture to the wires from the wall. Once the wire nuts are loose, you can pull the wires apart.
Step 4: Prepare the Wires
Once the wires are disconnected, you'll need to prepare them for the new fixture. Use wire cutters to cut the old wires about 6 inches from the wire nuts. Then, strip about 1/2 inch of insulation from the ends of the wires.
Step 5: Connect the Wires
Now it's time to connect the wires to the new fixture. Match the black wires from the fixture to the black wires from the wall, and the white wires from the fixture to the white wires from the wall. Twist the ends of the wires together and then secure them with wire nuts. Make sure the wire nuts are tight, but don't overtighten them.
Step 6: Mount the Fixture
Once the wires are connected, you can mount the new fixture to the wall. If you're mounting the fixture to drywall, simply screw it into place. If you're mounting the fixture to tile or stone, you'll need to drill pilot holes first.
Step 7: Level the Fixture
Once the fixture is mounted, use a level to make sure it's level. If it's not level, adjust the mounting screws until it is.
Step 8: Turn on the Power
Once the fixture is mounted and level, you can turn the power back on at the circuit breaker. Then, test the fixture to make sure it's working properly.
Tips
- If you're not comfortable working with electricity, it's best to hire an electrician to install the vanity light for you.
- Make sure to choose a vanity light that is the right size for your bathroom.
- When connecting the wires, make sure to twist them together tightly. This will help prevent the wires from coming loose and causing a fire.
- Once the fixture is installed, be sure to clean up any mess that you made.

How To Install A Vanity Light And Electrical Box Chic Misfits

How To Install A Bathroom Vanity Light For Quick Update Hunter Fan

How To Install A Bathroom Vanity Light For Quick Update Hunter Fan

How To Install Bathroom Light Fixtures Lowe S Lighting Youtube

How To Install A Vanity Light And Electrical Box Chic Misfits

How To Install Bathroom Vanity Lights Homeserve Usa

Install A Bathroom Light Yourself Louie Lighting Blog

How To Install A Bathroom Vanity Light For Quick Update Hunter Fan

How To Install A Bathroom Light Fixture Youtube

Guide To Hanging Bathroom Vanity Lighting And Mirrors Liven Design


