How To Build A Makeup Vanity
Any cosmetics fanatic understands that having a dedicated domain to keep their favorite products is crucial. Whether you have a big cosmetic kit or just a few basic products, a makeup vanity is a great option to keep everything organized and easy to find. Building your vanity allows you to personalize it to your own taste and storage requirements. Let's take a step-by-step approach to building a custom makeup vanity that matches your aesthetic and keeps your beauty essentials within reach.
Step 1: Plan Your Design
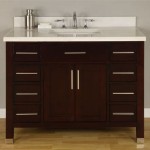
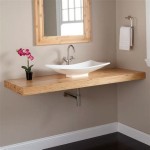
Envision the type of vanity you want. Consider the available space in your room and the size of your makeup collection. If you have a small room, a wall-mounted or floating vanity is a space-saving option. For ample storage, opt for a vanity with drawers, shelves, or compartments. Decide on the style that suits your decor, whether it's modern, traditional, or industrial.
Step 2: Gather Materials
Based on your design, gather the necessary materials. You'll need wood (plywood, MDF, or solid wood), plywood or MDF for the countertop, drawer slides, drawer pulls, hinges (if using doors), paint or stain, and finishing supplies (sandpaper, wood filler, primer, etc.). You may also want to include lighting fixtures for better visibility while applying makeup.
Step 3: Construct the Base
Start by building the base of the vanity. Cut the wood for the sides, back, and front panels according to your design. Assemble the panels using wood glue and screws or nails. Ensure the base is sturdy and square.
Step 4: Install Drawers and Shelves
If you want drawers or shelves, cut the wood to size and assemble them. Install drawer slides on the sides of the base and drawers. For shelves, cut supports and fix them inside the base at desired heights.
Step 5: Create the Countertop
Cut the plywood or MDF to fit the dimensions of the base. Attach it to the base using wood glue and screws or nails. For a more finished look, add edge banding or molding around the countertop.
Step 6: Install Doors or Drawers
If you opted for doors or drawers, attach them at this stage. Install hinges on the sides of the base and doors. Adjust the hinges to ensure smooth opening and closing. For drawers, mount them onto the drawer slides.
Step 7: Painting and Finishing
Sand any rough edges and apply wood filler to fill any gaps or holes. Once the filler dries, sand it smooth. Apply a coat of primer to the vanity and let it dry. Paint or stain the vanity in your desired color and apply multiple coats for a durable finish.
Step 8: Add Lighting
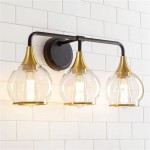
Good lighting is essential for applying makeup. Install LED strips, vanity lights, or a mirror with built-in lighting to illuminate your workspace. Position the lights strategically to avoid shadows.
Step 9: Organize and Accessorize
Arrange your makeup, brushes, and skincare products in drawers, shelves, or organizers. Keep frequently used items within easy reach. Consider adding additional storage solutions like magnetic boards, pegboards, or lazy Susans to maximize space utilization.
Step 10: Enjoy Your Vanity
Congratulations! Your custom makeup vanity is complete. Enjoy the convenience and organization it brings to your beauty routine. Regularly clean and maintain your vanity to keep it looking its best.

Simple Diy Project Makeup Vanity Table

Diy Makeup Vanity Ideas For Bedrooms And Other Small Spaces Decoist

Wall Mounted Diy Makeup Vanity Table With Storage An Easy Build

Diy Makeup Vanity With Glass Top

How To Build A Diy Makeup Vanity With Lights Desk Drawers

Diy Glass Top Makeup Vanity Liz Marie Blog

Diy Makeup Vanity Ideas For Bedrooms And Other Small Spaces Decoist

Diy Makeup Vanity Angela Marie Made

Diy Glass Top Makeup Vanity Liz Marie Blog

Diy Makeup Vanity With Pieces Peek Ponder
