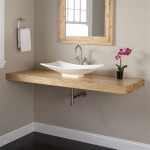
How Hard Is It To Install A Bathroom Vanity?
Replacing a bathroom vanity can dramatically improve the aesthetics and functionality of a bathroom. While the project may appear daunting, with the right preparation and tools, many homeowners find it a manageable DIY undertaking. Understanding the process and potential challenges can help determine if it's a suitable project to tackle independently or if professional assistance is required.
Assessing the Existing Situation
The difficulty of installing a bathroom vanity depends heavily on the existing plumbing and cabinetry. A direct replacement with identical dimensions and plumbing locations simplifies the process significantly. However, altering the vanity’s size or position introduces complexities involving plumbing modifications, potential wall repairs, and adjustments to the flooring. Carefully measuring the existing vanity and comparing it to the new unit’s specifications is the crucial first step. Inspecting the shut-off valves and drain lines for corrosion or damage is also essential to anticipate potential plumbing issues.
Required Tools and Materials
Gathering the necessary tools and materials beforehand streamlines the installation process. Essential tools typically include a level, measuring tape, adjustable wrench, pipe wrench, caulk gun, drill, screwdriver set, and safety glasses. Depending on the specifics of the project, additional tools like a reciprocating saw or basin wrench might be necessary. Required materials include the new vanity, faucet, drain assembly, supply lines, shut-off valves (if replacing existing ones), caulk, and potentially shims or wood filler for leveling.
Step-by-Step Installation Process
Installation begins with removing the old vanity. This involves shutting off the water supply, disconnecting the supply lines and P-trap, and detaching the vanity top from the cabinet. Once the old vanity is removed, the plumbing can be assessed and modified if necessary. If the new vanity requires different plumbing locations, a plumber’s expertise might be necessary to reroute pipes. After plumbing adjustments, the new vanity cabinet is positioned and leveled using shims if needed. The vanity top is then installed and secured to the cabinet. Next, the faucet and drain assembly are installed, followed by connecting the supply lines. Finally, the process concludes with caulking around the edges where the vanity meets the wall and testing for leaks.
Common Challenges and Solutions
Several challenges can arise during vanity installation. One common issue is uneven flooring, which can be addressed by using shims to level the cabinet. Dealing with outdated or damaged plumbing often requires replacing shut-off valves or sections of pipe. Another potential difficulty involves connecting the new vanity to existing plumbing that might not align perfectly. Flexible supply lines can often bridge minor discrepancies, but significant misalignments might necessitate professional plumbing adjustments. Lastly, ensuring a watertight seal around the drain assembly is vital to prevent leaks. Careful application of plumber’s putty or a silicone-based sealant is crucial for this step.
When to Call a Professional
While many homeowners successfully install vanities themselves, certain situations warrant professional assistance. If the project involves extensive plumbing modifications, rerouting pipes, or dealing with complex drain configurations, a licensed plumber's expertise is recommended. Similarly, if the existing wall or flooring requires significant repairs prior to installation, consulting a contractor is advisable. Finally, individuals lacking confidence in their plumbing or carpentry skills should consider hiring a professional to ensure a correct and safe installation.
Maintaining Your New Vanity
Once installed, proper maintenance can prolong the lifespan of the vanity. Regularly cleaning the vanity top with a non-abrasive cleaner helps prevent stains and buildup. Inspecting the plumbing connections periodically for leaks and addressing them promptly can prevent water damage. Avoiding placing heavy objects on the vanity top and using protective mats under toiletries can prevent scratches and damage. Proper ventilation in the bathroom can also help prevent moisture buildup, which can contribute to mold and mildew growth.

How To Install A Bathroom Vanity

How To Remove And Install Bathroom Vanity Diy Youtube

How To Install A New Bathroom Vanity And Sink Family Handyman

How To Install A Bathroom Vanity With Shelving Avoiding Mistakes

How To Install A Vanity Top Easy Step By Guide

How To Replace A Bathroom Vanity Lowe S

How To Install A Bathroom Vanity Youtube

How To Install A Bathroom Vanity With Floor Plumbing Sunny Bliss Air Formerly Jmk Hvac

Bathroom Vanity Installation Cost 2024 Average S

How To Install A Bathroom Vanity Selleys


