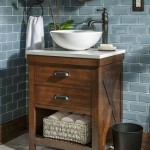
Converting A Dresser To A Bathroom Vanity
Are you looking for a unique and stylish way to update your bathroom without spending a lot of money? If so, converting a dresser into a bathroom vanity is a great option. This project is relatively easy to do and can be completed in a weekend, it is important to find a dresser that is the right size and style for your bathroom and that has enough storage space for and toiletries. You will also need to purchase a sink, faucet, and countertop, as well as any other hardware or accessories you may need. Please be aware that you should make sure that the dresser is made of a water-resistant material if it is not, you will need to seal it with a waterproof finish before you begin. It is important to note that, if your bathroom is particularly humid, you may want to consider using a different material, such as a laminate or tile. Nevertheless, with a little planning and effort, you can easily convert a dresser into a beautiful and functional bathroom vanity that will add a touch of personality to your space.
Step 1: Remove the hardware and drawers
The first step is to remove all of the hardware, such as the knobs or pulls, from the dresser. Next, remove the drawers from the dresser. This will give you a clear surface to work with.
Step 2: Cut the hole for the sink
Next, you will need to cut a hole in the top of the dresser for the sink. To do this, measure the sink and mark the outline on the top of the dresser. Then, use a jigsaw or a drill to cut out the hole. Be sure to leave enough space around the edges of the sink for the countertop.
Step 3: Install the sink
Once the hole is cut, you can install the sink. To do this, apply a bead of silicone caulk around the edges of the hole. Then, place the sink in the hole. Press down on the sink to secure it in place. Allow the caulk to dry completely before using the sink. You will need to connect the sink to the plumbing in your bathroom. To do this, follow the instructions that came with your sink.
Step 4: Install the countertop
Once the sink is installed, you can install the countertop. To do this, place the countertop on top of the dresser. Secure the countertop in place using screws or nails. Be sure to leave an overhang of at least 1 inch on all sides of the dresser. Please be aware that you can use any type of countertop you like. However, laminate and tile are popular choices for bathroom vanities.
Step 5: Install the faucet
Next, you will need to install the faucet. To do this, follow the instructions that came with your faucet. Be sure to tighten the nuts and bolts securely. You can drill holes for the faucet in the countertop or sink, depending on the type of faucet you have.
Step 6: Reattach the drawers and hardware
Once the faucet is installed, you can reattach the drawers and hardware. To do this, simply insert the drawers into the dresser and screw on the knobs or pulls. Be careful not to overtighten the screws.
Step 7: Enjoy your new bathroom vanity
Your new bathroom vanity is now complete! Enjoy the fruits of your labor.

How To Convert An Old Dresser Into A Bathroom Vanity Reinvented Delaware

Flipping Houses Home Renovation In Silicon Valley

How To Make A Dresser Into Vanity Tutorial An Oregon Cottage

How To Convert A Dresser Into Bathroom Vanity The Little By Home

Dresser Into Bathroom Vanity Vessel Sink

Stunning Bathroom Tour Dresser Into Double Vanity

How To Convert An Old Dresser Into A Bathroom Vanity Reinvented Delaware

How To Turn A Dresser Into Bathroom Vanity Oven Cleaner Wood Bleaching
/103058794-9279662b921c41259cb908f3cb19acd9.jpg?strip=all)
How To Turn An Old Dresser Into A Beautiful Bathroom Vanity

Antique Dresser Turned Into Vanity Farmhouse On Boone
