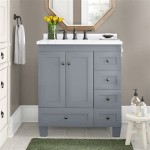
Chalk Painting a Bathroom Vanity
Chalk painting is a popular home decor technique that can be used to transform furniture, walls, and other surfaces. It's a relatively easy and inexpensive way to update your space, and it can be done with just a few basic supplies.
If you're thinking about chalk painting your bathroom vanity, here's everything you need to know to get started.
Supplies You'll Need
- Chalk paint in your desired color
- Paintbrush or roller
- Sandpaper (optional)
- Primer (optional)
- Polyurethane or wax finish
- Tack cloth
- Clean rags
Step-by-Step Instructions
1. Clean the VanityBefore you start painting, it's important to clean the vanity to remove any dirt or debris. Use a mild soap and water solution, and make sure to rinse the vanity thoroughly.
2. Sand the Vanity (Optional)If you want to achieve a distressed look, you can sand the vanity lightly before painting. This will help to create a more textured surface.
3. Apply Primer (Optional)If you're painting a vanity made of a dark wood, you may want to apply a primer first. This will help to prevent the dark wood from bleeding through the paint.
4. Apply Chalk PaintOnce the primer has dried (if you used it), you can start applying the chalk paint. Use a paintbrush or roller to apply the paint in even strokes. You may need to apply two or three coats of paint to achieve the desired coverage.
5. Distress the Vanity (Optional)If you want to achieve a distressed look, you can sand the vanity lightly after the paint has dried. This will help to create a more worn and aged look.
6. Apply a FinishOnce you're happy with the look of the vanity, you can apply a finish to protect it. You can use a polyurethane or wax finish. Apply the finish according to the manufacturer's instructions.
7. Enjoy Your New Vanity!Once the finish has dried, you can enjoy your new chalk painted bathroom vanity!
Tips for Chalk Painting a Bathroom Vanity
- Use a high-quality chalk paint for best results.
- Apply the paint in thin, even strokes.
- Allow the paint to dry completely between coats.
- If you're applying a distressed look, be careful not to overdo it.
- Apply a finish to protect the paint.
Troubleshooting
My paint is peeling.This could be due to several reasons, including poor surface preparation, using the wrong type of paint, or applying the paint too thickly. Make sure to clean the vanity thoroughly before painting, use a high-quality chalk paint, and apply the paint in thin coats.
My paint is cracking.This could be due to applying the paint too thickly or not allowing the paint to dry completely between coats. Make sure to apply the paint in thin coats and allow the paint to dry completely before applying a second coat.
My paint is not adhering to the vanity.This could be due to using the wrong type of paint or not priming the vanity first. Make sure to use a high-quality chalk paint and prime the vanity before painting if necessary.

Bathroom Vanity Makeover With Chalk Paint Decor Adventures

Bathroom Vanity Makeover With Chalk Paint Decor Adventures

Chalk Painted Bathroom Vanity Makeover Our Storied Home

Chalk Paint Bathroom Vanity Makeover Remodelaholic

Bathroom Vanity Makeover With Annie Sloan Chalk Paint

Chalk Paint Cabinets Bathroom Renovation Youtube

Easy Chalk Paint Bathroom Vanity Makeover Simply House Love

Bathroom Vanity Makeover With Chalk Paint Decor Adventures

Bathroom Vanity Makeover With Annie Sloan Chalkpaint

Bathroom Vanity Makeover With Annie Sloan Chalk Paint
See Also

