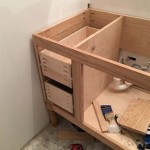
How To Replace A Bathroom Vanity
Replacing a bathroom vanity can be a great way to update the look of your bathroom and increase its functionality. It's a project that can be completed in a weekend with the right tools and materials, but it does require some planning and preparation.
Here's a step-by-step guide to help you replace a bathroom vanity:
1. Planning and Preparation
Before you start, it's important to plan and prepare for the project. This includes gathering the necessary tools and materials, as well as preparing the bathroom for the installation.
Here's a list of tools and materials you'll need:
• New bathroom vanity
• Vanity top
• Sink
• Faucet
• Drain assembly
• P-trap
• Shut-off valves
• Adjustable wrench
• Plumber's putty
• Screwdriver
• Level
• Caulk gun
• Caulk
Once you have all of your tools and materials, you can start preparing the bathroom for the installation. This includes removing all of the items from the vanity, as well as disconnecting the water supply and drain lines.
To disconnect the water supply, simply turn off the shut-off valves located under the sink. Then, use an adjustable wrench to disconnect the water lines from the faucet and sink. To disconnect the drain line, simply remove the P-trap.
2. Removing the Old Vanity
Once the bathroom is prepared, you can start removing the old vanity. To do this, simply remove the screws that are holding the vanity to the wall and then carefully lift it off of the floor.
If the vanity is particularly heavy, you may need to have someone help you lift it. Once the vanity is removed, you can then remove the vanity top and sink.
3. Installing the New Vanity
Once the old vanity is removed, you can start installing the new vanity. To do this, simply place the new vanity in the desired location and then secure it to the wall using the screws that were provided.
Once the vanity is secured, you can then install the vanity top and sink. To install the vanity top, simply place it on top of the vanity and then secure it using the screws that were provided. To install the sink, simply place it in the opening in the vanity top and then secure it using the screws that were provided.
4. Connecting the Water Supply and Drain Lines
Once the vanity and sink are installed, you can then connect the water supply and drain lines.
To connect the water supply, simply connect the water lines to the faucet and sink using the compression fittings that were provided. To connect the drain line, simply install the P-trap and then connect the drain line to the P-trap.
5. Finishing Touches
Once the water supply and drain lines are connected, you can then add the finishing touches to your new vanity. This includes installing the faucet, adding caulk around the sink and vanity top, and installing the cabinet doors and drawers.
To install the faucet, simply place it in the opening in the sink and then secure it using the nuts that were provided. To add caulk, simply apply a bead of caulk around the sink and vanity top and then smooth it out using your finger.
To install the cabinet doors and drawers, simply align them with the openings in the vanity and then insert the screws that were provided.
Replacing a bathroom vanity is a great way to update the look of your bathroom and increase its functionality. It's a project that can be completed in a weekend with the right tools and materials, but it does require some planning and preparation.

How To Install A Bathroom Vanity And Sink

How To Remove A Bathroom Vanity Budget Dumpster

How To Replace A Bathroom Vanity The Handyman Youtube

Youtube

How To Install Or Remove A Bathroom Vanity Homeserve Usa

Youtube

Replace Vanity Top And Faucet Diy Network Youtube

Diy Guide Find Out How To Replace A Bathroom Sink Ron Hazelton

How To Replace A Bathroom Vanity Youtube

11 Low Cost Ways To Replace Or Redo A Hideous Bathroom Vanity Hometalk


